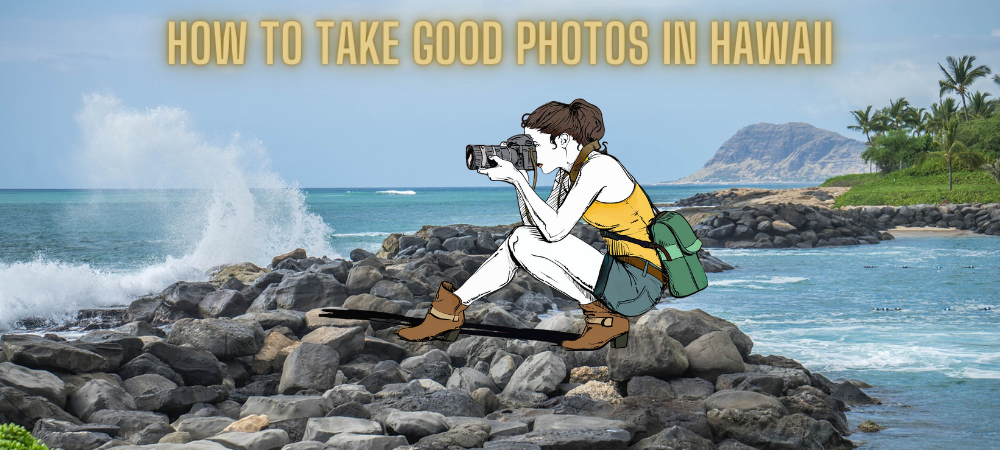
How to take good photos in Hawaii
Aloha! Welcome to Hawaii – the photo-paradise! Read this guide to learn the best tips for taking good photos in Hawaii. You can keep your best memories forever, AND you can impress your friends.
Breathtaking natural scenery, with its volcanoes, beaches, and mountains, make Hawaii a stunning location. Add varied wildlife, amazing weather, and light condition to get the perfect destination for photographers of all levels.
Taking good photos of Hawaii islands will make you satisfied whether you are an advanced photographer or a beginning amateur. Amazing shots are within reach for everyone, no matter how professional your camera is. Even your smartphone can ensure beautiful pictures of Hawaii in your album. Indeed, according to the latest statistics, 64% of professional photographers take at least half of their personal photos on a smartphone. No doubts here: the smartphone is enough.
Since it is so easy to take beautiful shots, making them outstanding is difficult. Travelers often wonder: how to take a great-looking picture that will keep their memories for a lifetime?
Use the weather to your advantage
In Hawaii, the weather can be varied depending on the season and the specific island. Since a tropical climate ensures you a lot of sunshine, occasional rain showers also appear. It’s especially true about the wettest months: from November to March.
Whenever you visit Hawaii, get ready so that the weather can go from sunny to rainy to sunny in an hour. So, it’s better to be flexible than to plan your shots for specific weather conditions. Ensure you have a waterproof camera or at least a waterproof cover to keep your camera or smartphone safe in case of rain.
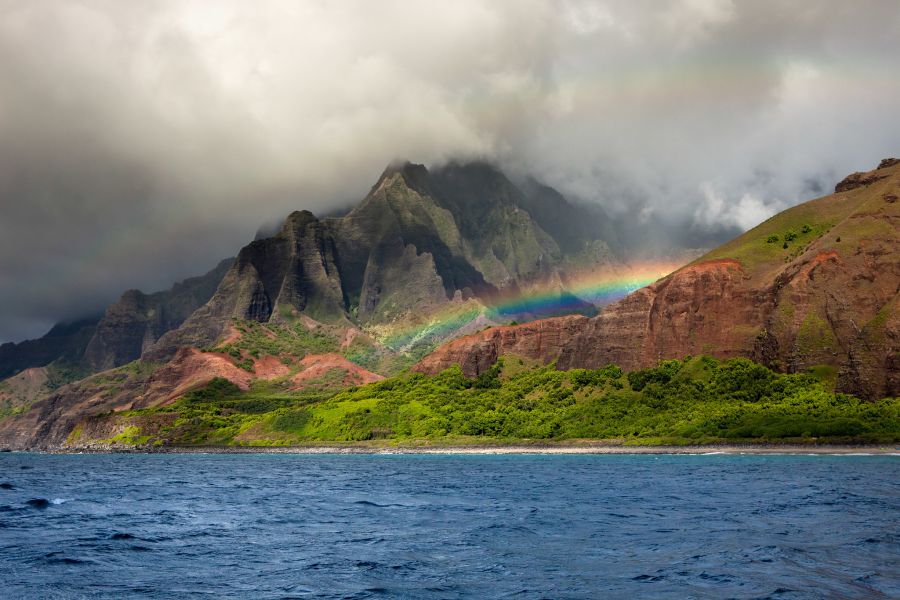
Most people wish to take sunny Hawaiian pictures, and the rain disappoints them. Keep in mind that the rain doesn’t last forever! Moreover, rainy weather can give you a chance to take much more interesting pictures. Just imagine clouds hanging over valleys and raindrops on vivid green leaves. Also, breaks in the rain are the best time to catch the rainbow, the symbol of Hawaii!
Believe it or not, after some rainy photographs in Hawaii, you will start wishing for a rain.
Take good photos in Hawaii using a circular polarizer
Have you ever heard about circular polarizers? Not yet? Well, visiting Hawaii is the perfect opportunity to learn about this helpful photo filter!
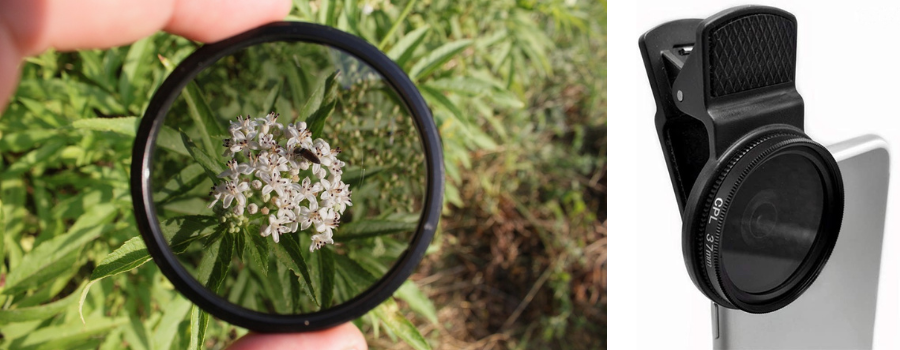
A circular polarizer is a photographic filter that reduces reflections and cuts the glare off the ocean’s surfaces and bounces off trees, rocks, and other objects. As a result, you get more contrast and vibrant colors in your nature images. For example, your sky colors are deeper blues, looking at your pictures exactly as in life!
You can expect sunny weather in Hawaii, with many glares that are too light or obscure the details of your images. Also, you’ll often take pictures of the ocean and nature. So, a circular polarizer is a must-have accessory for Hawaii photographers!
Luckily, smartphone users can also benefit from this gadget. There’s a clip-on circular polarizer dedicated to cell phones.
Learn photography basics to get best photos in Hawaii
Using a camera setting is what distinguishes an average and a great photographer. Explore the basics of exposure settings to see the difference in your Hawaii pictures!
For example, you can use shutter speed to get an expected effect when photographing waterfalls, leaves in the wind, or the fire dances at the luau. A fast shutter speed (like 1/1000s) will freeze the movement, while a long shutter speed (like 1/60s) will blur it. It’s your decision whether you want to take a smooth, fuzzy waterfall or frozen drops of water.
Also, get familiar with composition rules. Whether it’s a palm tree, your friend or a waterfall, do not put your central theme in the center of the picture. Instead, use the rule of thirds: place it in either the grids or the intersections of a 3×3 grid. It will guide the gaze to the main element of the picture, making it more attractive.
Knowing photography basics is a game-changer. It allows you to take pictures that not only keep your memories alive, but also look gorgeous as framed pictures on your bedroom walls.

Get familiar with local time and lighting
Suppose you want to capture the best pictures in Hawaii. In that case, it’s important to get familiar with the local time and lighting for your destinations.
The sunrise and sunset times can shape your photo clock, and the way the sun moves around the sky can affect the angles at which the light falls. To ensure you’re prepared, consider downloading an app that will show you everything you need to know.
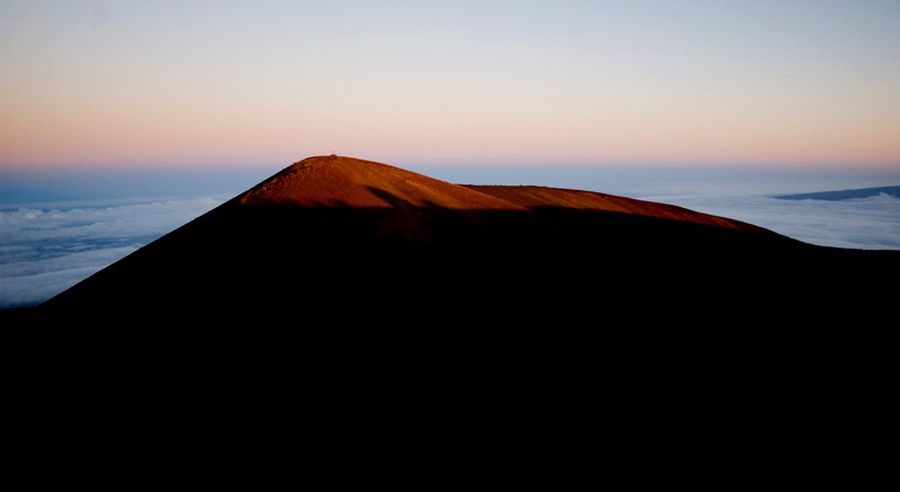
One great opportunity to take good photos in Hawaii is during the golden hour: one hour before sunset and one hour after sunrise. It’s good for you to know that due to its proximity to the equator, the midday light is stronger and sharper than in other parts of the world. That’s why it’s especially worth hunting for soft evening golden hour light here!
During the golden hour, the light is calm, rays fall low, and there’s diffuse light with soft shadows and more intense colors. Water vapor is drawn into the air by Hawaii’s exceptional geography, which facilitates humidity scattering. It increases the intensity of coloration in the sky in the early evening. The golden hour is also an excellent time to capture the dramatic shadows coconut trees create.
So, make sure to plan your photo shoots around the local time and take advantage of the golden hour to get the most stunning pictures in Hawaii.
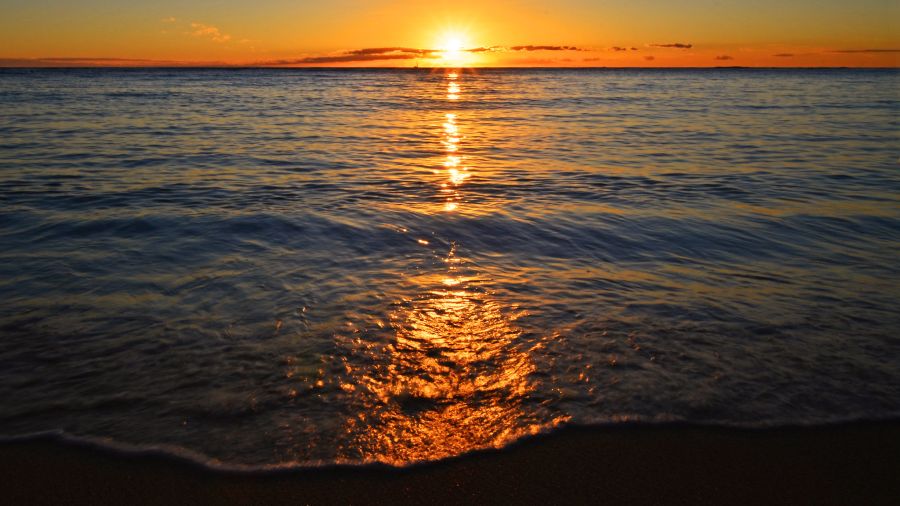
Take perfect sunset and sunrise photos
The view of the sun half-dipped in the sea is one of the iconic views of Hawaii. Here are some best tips on how to capture this memorable scene for yourself.
First of all, consider between sunset and sunrise.
Sunrises:
- you have to wake up early
- some beaches can be closed, so you have a limited choice of locations
- you can expect an empty beach, so you will have more freedom in composing your picture
- you have more peace to enjoy the view.
Sunsets:
- more crowded
- more rich, vivid colors
- fascinating clouds shapes occur more often
- the ideal ending to a wonderful day.
Whether you choose sunset or sunrise, remember to come a bit earlier. In the morning, the beach will get light even before dawn. In the evening, the sun will set faster if clouds are on the horizon.
How to find the best day for your sunrise photoshoots? Use weather data! Weather forecasts help predict how colorful the sunset or sunrise will be. It all depends on the cloud ceiling: the higher they are, the higher the chance for beautiful colors!
While taking sunset pictures, people are often disappointed with the result. Pictures on smartphone or camera displays don’t look as beautiful and vivid as what they see with their naked eye. That’s because the sun is too light for your camera, and it tries to compensate for this brightness. It results in washed colors of the sky.
That’s what happens if you point your camera directly at the setting sun. But here’s a trick: point your camera just above it, press your shutter button halfway down, then move the camera down and take the shot. Just remember to keep your button halfway pressed all this time! Thanks to this trick, the camera measures more dark colors of the sky instead of the sun and keeps them colorful when taking the shot. It allows capturing the beautiful colors of the sky and the setting sun.
Visit hotspots to take good photos in Hawaii
No doubt, Hawaii is a totally stunning archipelago. Whether you visit Maui, Kauai or Oahu, you will be driven by the desire to take a photo every five minutes. But still, some spots are more picturesque than others.
Do you want to get the best chances for amazing Hawaii photos? Consider visiting one of those Instagrammable photo destinations. The list goes on:
- Hanauma Bay, Oahu
- Waikki Beach, Oahu
- Na Ala Hele, Oahu
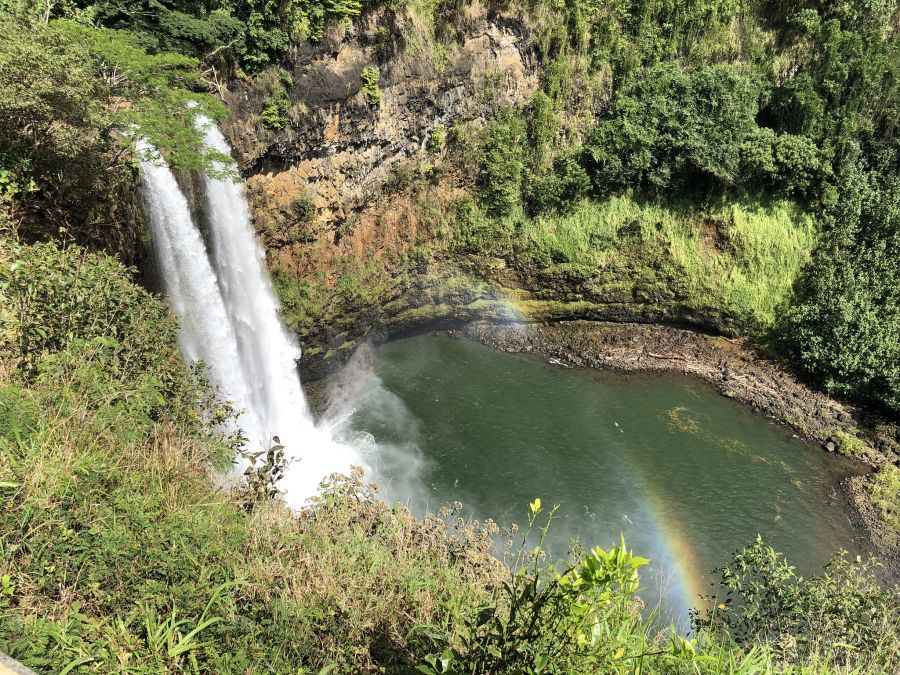
- Wailua Falls, Kauai
- Tunnels Beach, Kauai
- Queen’s Bath in Princeville, Kauai
- Waimea Canyon Lookout, Kauai
- Haena Beach & Kalalau Trail, Kauai
- Heart Rock, Maui
- Pipiwai Trail Bamboo Path, Maui
- Hana Highway, Maui
- Kahala Beach Palm Tree Island, Oahu
- Kilauea Volcano, Big Island
- Rainbow Falls, Big Island
When visiting the most popular places, be prepared for a crowd. It may be challenging to capture the view without people on it. Another challenge is to take a unique picture. Remember to take time, observe, and reflect on taking a different angle. It will ensure you a perfect Hawaii picture that will stand out from the crowd!
Learn about the local photography restrictions
Last but not least: become familiar with the local law.
Going to Hawaii, you must be aware it’s an area with specific photography restrictions. According to the Hawaii film office, any photography that you will earn money or exposure by putting it online is considered commercial photography. As an influencer, you also must acquire the correct permissions to publish your pictures on social media. They are required regarding all places besides private land.
Don’t worry if you are taking photos just for pleasure. A hobbyist activity doesn’t require specific permissions. You can also share your pictures with friends and family – at least as long as you don’t ask them to pay for them!
Visit the website of the Hawaii Film Office to get a better understanding of the kind of photograph permits in Hawaii.
Wrapping up
Pinch of technical skills, a bunch of knowledge, a whole lot of creativity – and you get it!
Those three features will make your pictures from Hawaii outstanding and first-class. Now, keep your eyes open, look around and… track down photographic framing. With the right framing, you can create a sense of depth and perspective that will elevate your pictures to the next level. Look for natural frames such as trees, and rocks. Experiment with different angles and compositions to find the perfect shot. Don’t be afraid to get creative and try new things – after all, that will set your pictures apart.
In short, remember to combine your technical skills, knowledge, and creativity with the art of framing, and you’ll surely capture unforgettable pictures of Hawaii. And actually, this experience will leave you with skills that will last a lifetime!
Mahalo for reading – and keep shooting!

Karolina Turowska, a writer and travel enthusiast at PhotoAiD. When it comes to writing, she loves bringing dry facts to life. When it comes to traveling, she just loves bikes.


One thought on “How to take good photos in Hawaii”
First thing: weather and lighting matter big time. Hawaii’s tropical climate means you’ll get plenty of sunshine — but also quick-changing conditions like rain showers, especially between November and March. The article reminds you: don’t lose your mind over a little rain. In fact, those clouds and raindrops can make epic shots of rainbows, lush leaves and dramatic skies.
Next: pay attention to time of day. Photo professionals swear by the “golden hour” — roughly one hour after sunrise and one hour before sunset — because the light gets soft, warm and does amazing things to colors and shadows. In Hawaii, midday light can be harsh, so if you’re wandering around in full sun you may end up with flat, washed-out images.
Then there are composition and gear tips: even with a smartphone you can get great results if you apply things like the “rule of thirds” (i.e., don’t always place your subject dead-centre). And if you’re using a camera, a circular polarizing filter can help reduce glare from the ocean or leaves and bring out richer colors.
If you were chatting with a friend: “Hey, when we go to Kauai or Maui we should get up early for sunrise, pick a lookout with a palm tree in the foreground, and avoid shooting right in the blazing noon light. Even my iPhone can do it if we focus on good light and composition.”